Note: I just received word that my LaunchPad has been shipped, and so I should have it soon. I figured it'd be good to make some forward progress anyway, so I'm going to go ahead and do this post using my 28-pin TSSOP target board with the F2132, but talk in terms of the G2211 and the LaunchPad. I'll change any discrepancies as soon as I have a LaunchPad with which to program and take pictures.
This post will describe a little of what you need to use TI's Code Composer Studio. This programming environment, or Interactive Development Environment (IDE) is based on the open-source project Eclipse. Eclipse is a great editing environment, and you should find it fairly easy to use for programming your MSP430. The
TI LaunchPad wiki has a link from which you can download the software; it does require registration with TI, but with your account you are also able to request free samples of other products (including MSP430's) to try out. CCS can be used free of charge, but limits you to 16 kb of code. While that may not sound like much, keep in mind the MSP430's that come with the LaunchPad have no more than 2 kb of programming space! Code used to program the MSP430 turns out to be very efficient and dense, and won't take up much space. We'll be able to see how much space our code takes up when we start using the debugger included with CCS.

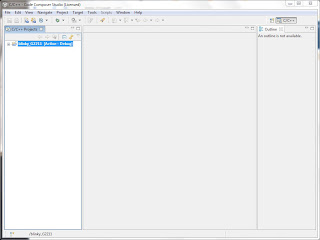
Once you've installed CCS, start it up and it will ask for a workspace. The workspace is just the directory where you will keep your projects; you can always change it later if you need to with the 'Change Workspace' option in the file menu. For now, use something simple, like ~/My Documents/MSP430 LaunchPad. Once that's done, you should have a welcome screen come up, that looks like this image. You can enter the IDE itself by clicking on the cube in the upper right corner; but first, take note of the Getting Started icon. Clicking on this will bring you to a few links with lots of helpful information on how to use CCS. I would recommend looking through these before getting started, especially if you've never used an IDE before.

Assuming you've now done that, or are comfortable already with this type of interface, close the welcome screen (you can come back to it with the 'Welcome' option in the help menu) and bring up the interactive editor. There's not too much here at first, so let's go ahead and start a new project. Select File → New → CCS Project, and name your project something descriptive. I like to give the program a name, and include a suffix to specify which MSP430 the program is targeting. For blinky, I name the project something like blinky_G2211. Click Next, and make sure that the Project Type is selected as MSP430 (should be the only option if you installed the CCS version with only MSP430 support.) Click Next. There's nothing to do on the next page for now, so click Next again. On the final screen, we need to choose the device we're programming. Make sure the Output Type is selected as Executable, and then choose the MSP430G2XXX in the filter for the Device Variant. The filter allows you to select subfamilies of the MSP430 to reduce the number of devices you have to sort through to find yours. Once you've filtered the results, choose MSP430G2211 for the Device Variant. For now, the other options should be fine with their default settings. A quick word before continuing; be sure you choose the correct device variant here; different linkers are needed for different MSP430 devices, so be sure to choose the one that matches your target device.
Click next one last time, and you should see your new project come up in the left-most window. The project creates a sub-directory in your workspace that holds all the files and information needed for downloading the code into your chip. But first, we need to make some code to download. Go to File → New → Source File, and enter a name for the source file that ends with .c; something descriptive is helpful, but for larger projects with multiple source files, something like main.c is a good choice. Note that CCS will give you a warning until your filename has a .c extension on it. Go ahead and click Finish, and a new window opens up in which you can type your code. Go ahead and fill in your code for blinky, and be sure to give it some good comments to explain how it works. Make sure you have one blank line at the end. CCS defaults to issuing a warning if there is any text on the last line of the code. If someone knows how to change this behavior, let me know. Otherwise, just live with the quirk.

Note that I've changed the size of my windows. I like to have my editor show 80 columns (a standard for terminal windows) so that I can avoid overly-long lines of code if possible. Feel free to adjust the window sizes to whatever is useful to you. Ok, we have code, now we need to compile it. Technically we don't have to compile before loading it into our MSP430, but I think it's a good idea to get all compile-time bugs sorted out first. The 'Build Active Project' button to the right of the print button will compile your code for you. Alternatively, you can select Project → Build Active Project. If you didn't make any typographical errors, your code should compile without any errors. The compiler brings up two new windows at the bottom: a Console showing the compiler commands and results, and a Problems list that would show any compiler errors or warnings. The code given in the previous post should compile error-free.

Alright, now that we're confident our code should work, let's load it into the MSP430! Plug your LaunchPad into your USB port. If you've installed the drivers correctly, then click the Debug button (looks like a little beetle) or alternatively select Target → Debug Active Project. The debugger will change the windows, make sure your code has been compiled since any changes were made, then check to be sure your MSP430 is connected. If your chip isn't powered properly, it won't detect the device at all. If everything is powered and installed right, it should just load the code and give you the debugging environment windows. Note that at the bottom window, it shows you the size of the code loaded into the MSP430. Blinky (as I wrote it) shows
Text: 86 bytes Data: 2 bytes. Blinky is by no means a complicated program, but as you can see the size of our programs won't be very high. the 2 kb that comes with each of your G2211 and G2231 is more than enough for what you are able to do with those chips.
If you were expecting right away to see your LED blinking away merrily, you'll be disappointed. The debugger actually holds the chip in a state just after a Power Up Reset (abbreviated PUC). In the middle window, you should see your code with the line at
void main(void) { highlighted. This window shows the position in the code the chip is currently looking. We'll look at using this feature to our advantage shortly, but for now just click the green 'Run' arrow at the left side of the debug window. This turns off the debugging control of the clock, and lets the MSP430 run normally. The LED should be blinking about once a second or so. If, however, you run your program and the LED stays on, check to make sure you fixed the problem in my original code; if you declare int count; you won't ever count up to 60,000. You should be declaring unisgned int count; in your code instead.
If after all of this you see your LED blinking, then congratulations, you've just finished your first MSP430 project! Otherwise, move on to the next tutorial anyway. If you can't get your code to work, then the debugger may be able to show where the error is occurring. To leave the debugger, click the 'Terminate All' icon near the 'Run' icon.


7 comments:
So how can you load the program to the chip without entering debug mode?
I just want to flash the chip with the program and let it run it's thing.
David, I followed your tutorial and programmed the MSP430G2211 with the Blinky.c on the LaunchPad. It worked as indicated by you. Thanks for walking me thru.
Fantastic! I've been banging my head against this virtual wall for a long weekend, searching all over the 'net for how to solve the stupid error I was getting about the device type being wrong.
Your tutorial solved it.
It seems that if you don't select the right device at the "Start a new project" stage, then you are scuppered, regardless of how many times or ways you try to get the Code Composer Studio to let you change it, or what it actually says in the window or XML when you do.
All I got for ages was "MSP430: Trouble Writing Memory Block at 0x200 on Page 0 of Length 0x1094: Could not write device memory
Cannot write to target"
Starting again from scratch and following your instructions 100% got me past this "Gotcha"!
Thanks!
Dear sir,
I am a new one fo MSP430 lunchpad,
I use CCS Version: 4.2.3.00004 and I tried to run the Temperature_Sense_Demo project in debug mode then I got an error as below:
MSP430: Trouble Writing Memory Block at 0xf800 on Page 0 of Length 0x5b2: This operation is not supported by this driver
What I did wrong or what should i do?
Many thanks
Chin Cheng Chen from Taiwan.
@Matt
I think that you can just load your program with debug mode, but you don't have to run it. after debuging just take it off from USB port and give an external vcc-vss, your code will work on controller.
@ Travis
Thanks for the Work, i watched my 10yo code up the first 2 of your examples... He is now on cloud-9.
Could not have done it without your blog... Happy-Happy.
Thanks a lot for the examples. I also found another MSP430 Tutorial that was helpful in getting the launchapd runing for me.
J.
Post a Comment